NAT is an abbreviation for Network Address Translation. NAT is designed for IP address conservation. Before the data packets be transmitted to the outside network, NAT will convert the internal IP address to the external IP address. Therefore, it enhances the security of the internal network by keeping internal addressing private from the external network.
In this tutorial, we will study how to configure Static NAT and Dynamic NAT using Cisco Packet Tracer.
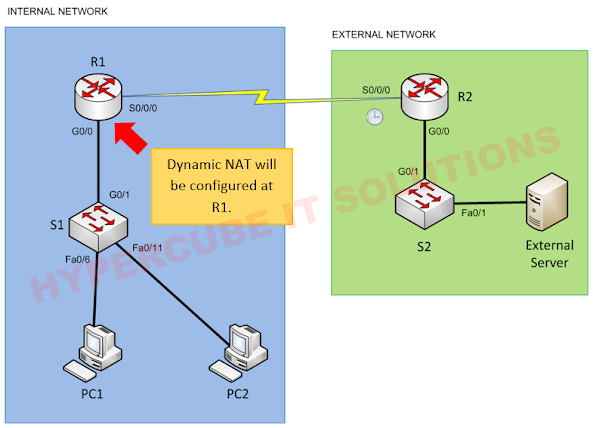
We have INTERNAL NETWORK and EXTERNAL NETWORK, as shown in figure below.

Dynamic NAT will be configured at R1 router.
Static NAT will be configured at R2 router.
This is the IP address we need to configure in every device.
ANSWER
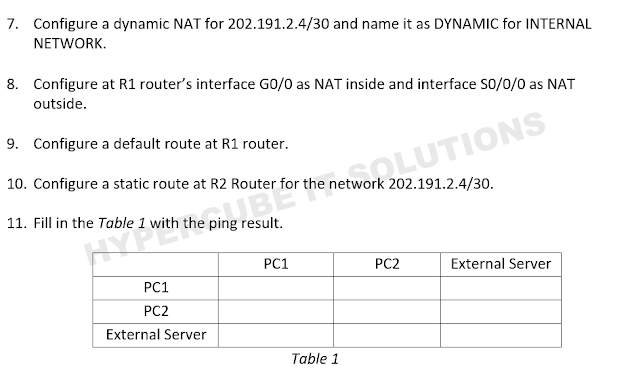
From the observation, we notice that devices in INTERNAL NETWROK can ping External Server's NAT IP address only.
R1 Configuration
interface GigabitEthernet0/0
ip address 192.168.15.1 255.255.255.0
ip nat inside
interface Serial0/0/0
ip address 202.111.222.10 255.255.255.0
ip nat outside
ip nat pool DYNAMIC 202.191.2.5 202.191.2.6 netmask 255.255.255.252
ip nat inside source list 1 pool DYNAMIC
access-list 1 permit 192.168.15.0 0.0.0.255
ip route 0.0.0.0 0.0.0.0 202.111.222.20
R2 Configuration
interface GigabitEthernet0/0
ip address 10.10.10.254 255.255.255.0
ip nat inside
interface Serial0/0/0
ip address 202.111.222.20 255.255.255.0
ip nat outside
ip nat inside source static 10.10.10.50 202.191.2.1
ip route 202.191.2.4 255.255.255.252 202.111.222.10


No comments:
Post a Comment
Note: Only a member of this blog may post a comment.